
Installing PKI SSL Certificate on HPE iLO
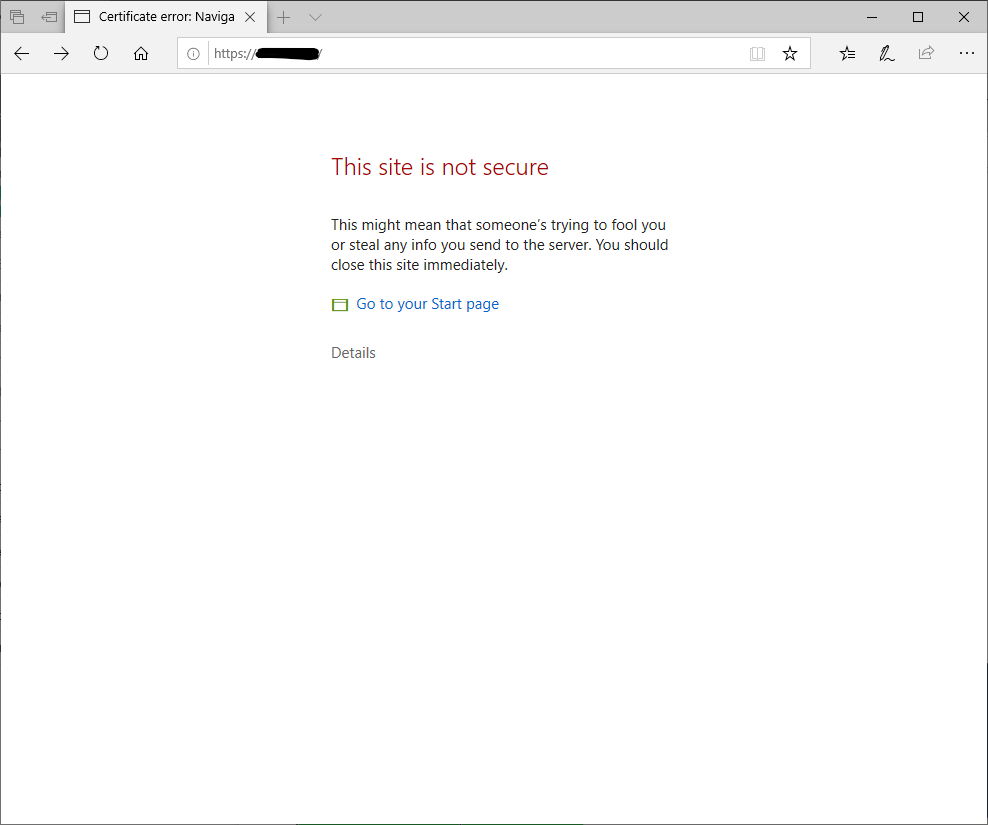
I work with HPE Systems almost exclusively, and as of late I have been getting very irritated with the browser warning about the self signed SSL cert that is installed on the HPE iLO by default.
You have to jump through a few clicky hoops and the browser remembers none of it the next time you visit the page. So, the real solution for this, and probably something that should be done anyway, is to install a certificate issued by a corporate certificate authority. The process for doing this isn’t very difficult, its more just cumbersome and, with HPE iLOs, its quite time consuming as well. Anyway, I put together a script to make this much easier, I put it together fairly quickly as well, so I’m sure that there are things could be improved, but the concept is solid.
Manual steps
I suppose before we jump into the automation portion, as with anything that is being automated, its best we cover the manual steps for reaching our goal so we fully understand what needs to be done, and what information is needed to get it done.
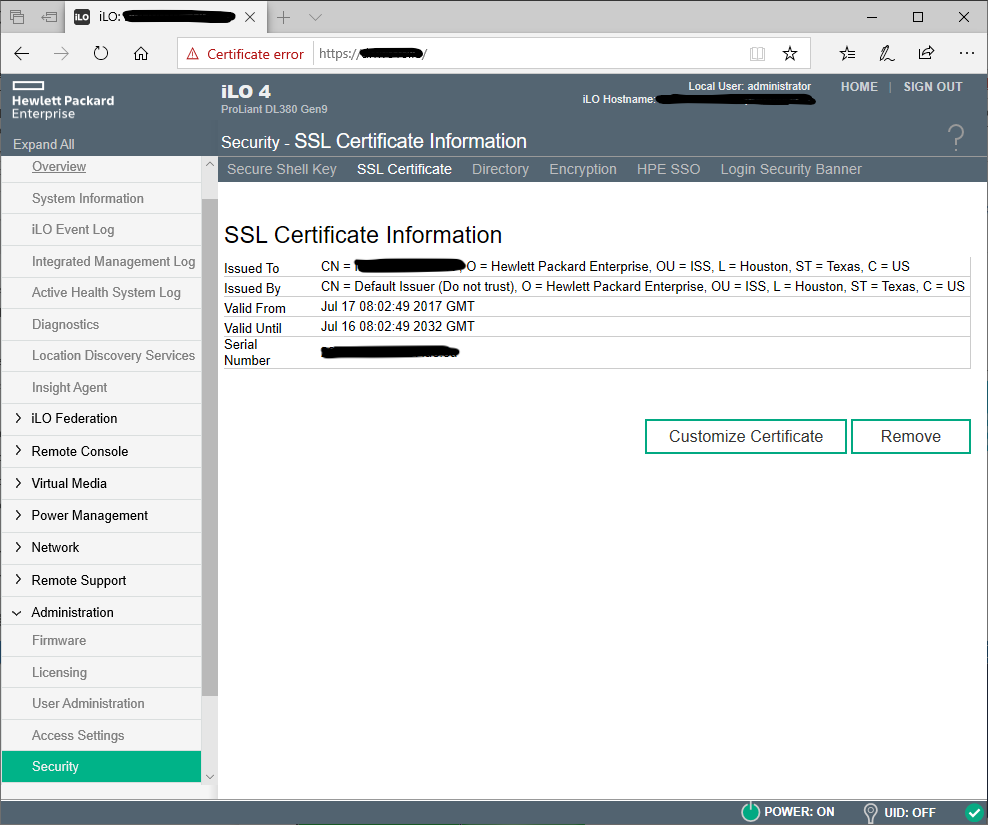
After signing into the iLO, in the Administration section in the Security workspace, there is an SSL Certificate tab. On that tab you select the Customize Certificate button, and from there you will get a dialog, asking for the basic information to build the Certificate Signing Request.
Required values:
- Country
- State or Province
- Locality or City
- Organization
- Common Name (this can be the FQDN or the short name, despite what the warning says, the short name works too.)
Optional values:
- Organizational Unit or Department
- Include the iLO IP Address in the CSR
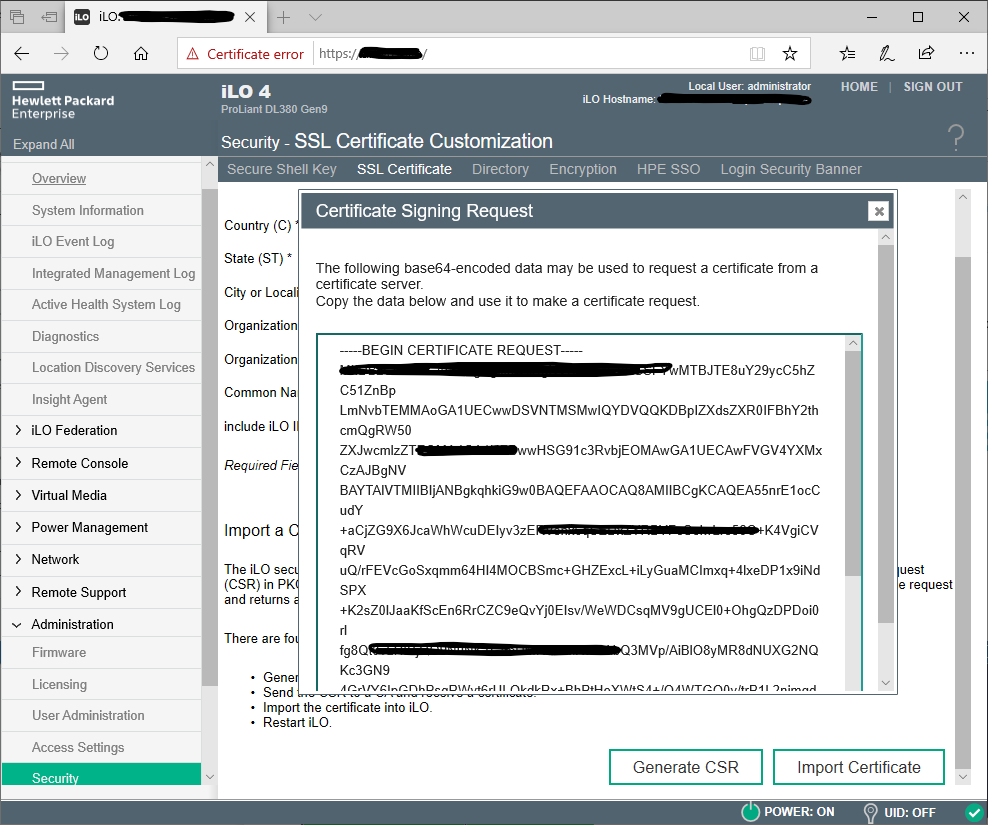
After filling these in, hit the Generate Request button. Now this part is really dumb, the CSR is generating, but it takes a random amount of time (0-10 minutes), with no progress control. You just keep hitting the Generate Request again and again until the dialog pops up
The iLO subsystem is currently generating a Certificate Signing Request (CSR). This may take 10 minutes or more. In order to view the CSR, wait 10 minutes or more, and then click the “Generate CSR” button again.
Once the dialog opens, you will need to copy the entire CSR output, including the -----Begin/End Certificate Request----- portions.
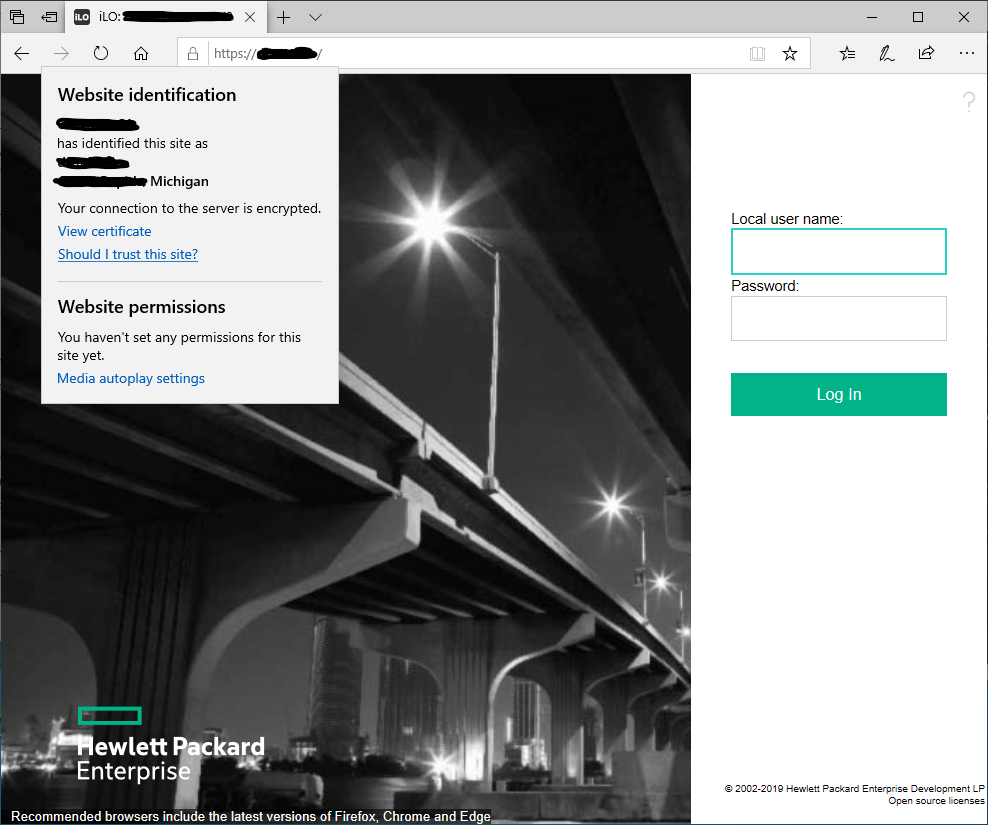
After you have the CSR, browse out to your CA and generate an Advanced Certificate Request, paste in the CSR, select your desired template, and submit the request. (I’m not going into info on CAs and templates in this walk through, I’m sure either you know how to do this, else ask your PKI admin). On the certificate download page, select the BASE64 encoding, and download the certificate, you do not the entire chain. Lastly, on the same screen in the iLO, you select the Import Certificate button, and in the dialog, you will paste your cert data. You get this by right clicking the certificate file you generated and downloaded, and select Open With -> Notepad and there you will get a similar result as the CSR, but a longer string of random characters, that is what you paste in the iLO dialog. If this was all done correctly the iLO will reset, and you will have a custom certificate installed. And no more security warning if you browse to it by the name you entered into the Common Name property.
Whew! Lets automate this.
As you can see, there really isn’t that many steps, but I have hundreds of HPE servers, and there is no way in Hell I am going to sign into each one, generate a CSR, wait, wait, wait, then go to my CA, submit the request, save it, open it, and paste it in the web page hundreds of times. So I started messing with the HPEiLOCmdlets PowerShell Module, and using those its pretty easy to start the CSR generation, and once its created, use certreq.exe to submit the request, and the HPEiLOCmdlets can be used to install the certificate as well.
Breaking Down The Code
The cmdlet I created is called New-HPEiLOPKICertificate Here is the usage:
New-HPEiLOPKICertificate.ps1 [-Credential] <pscredential> [-iLOName] <string[]> [[-Country] <string>] [[-State] <string>] [[-Locality] <string>] [[-Organization] <string>] [[-OrganizationalUnit] <string>] [[-CertificateAuthorityName] <string>] [[-CertificateTemplateName] <string>] [[-FirmwareMinimumVersion] <version>] [-IncludeiLOIP] [<CommonParameters>]
The parameters pretty much all line up with the values discribed above, with the exception of a few:
Credential- This is aPSCredentialobject for the iLO login credentials, useGet-Credentialto populate this value.iLOName- This is theCommonNamecan be the FQDN or the shortname.CertificateAuthorityName- This is yourCAinstance, you can find this by just typingcertreqinCMD.CertificateTemplateName- The template to submit yourCSRagainst.FirmwareMinimumVersion- TheHPEiLOCmdletsseem to only like newer iLO versions, I can tell you 2.55 does not work, but 2.70 does.
If you want you can set default parameter values in the script, so your really only have to change the iLOName.
New-HPEiLOPKICertifacte.ps1 -iLOName myHPEiLO.tomohulk.io -Credential ( Get-Credential )
The workflow of the cmdlet is pretty straight forward:
- Connect to the iLO.
- Verify the firmware version is a minimum version.
- Begin the CSR generation with the supplied values.
- Looping every 5 seconds, query the iLO to see if the
CSRhas been generated. - Export the
CSRto a temp file. - Submit the request to the the
CAusingcertreq.exe. - Use resulting
.pemfile to upload the new certificate to the iLO. - Delete the temporary
.csrand.pemfiles.
This cmdlet accepts pipeline input for the iLOName as well as a StringArray, so as long as they have the same credentials, you can complete this on multiple systems at once:
@("ilo1", "ilo2") | New-HPEiLOPKICertificate -Credential ( Get-Credential )

# or

New-HPEiLOCertificate -iLOName "ilo1", "ilo2" -Credential ( Get-Credential )
Thats pretty much it, after the iLO resets and you refresh the page, you will see your connection is now secure.
Here is the complete code, cheers!: